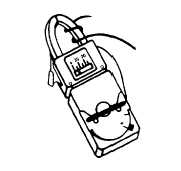
Using the adapter with the attachment lead -
1.
Rotate the lever on the bottom of the adapter until it points straight out (See Figure 1).
2.
Install the adapter on the top of the attachment lead Rotate the lever back against the adapter (See
Figure 3).
3.
Plug test lead bar into attachment lead (See Figure 3).
4.
Plug attachment lead into VOM (+) and COM (-) jacks of VOM (polarity of leads is not important).
5.
Set the VOM switch to AC AMPS or 3 AC VOLTS.
6.
Set the adapter switch to 300 AMPS.
7.
Press the handle on the side of the adapter to open the jaws Place the jaws around ONE conductor
and release the handle (See Figure 2).
8.
Adjust the adapter switch for maximum meter deflection without going off-scale.
9.
Read AC Amperes on the AC AMPS or 3 AC VOLTS scale as directed below.
Adapter Range
Reading on 3 AC
Reading on
AC Amperes
VOLTS Scale
AC Amps Scale
6
0-3 (x 2)
06
12
0-3 (x 4)
0-12
30
0-3 (x 10)
0-30
60
0-3 (x 20)
0-6 (x 10)
120
0-3 (x 40)
0-12 (x 10)
300
0-3 (x 100)
0-30 (x 10)
OPERATING NOTES
Figure 4
Do not place the jaws of the adapter around more than one wire An incorrect reading will result.
When reading is below half scale on the 6 AC Ampere range, greater accuracy can be achieved by wrapping the
conductor around the jaws twice (Figure 4). This would double the sensitivity of the adapter, and the actual current
flowing would be half that indicated by the meter. Likewise, more turns can be added around the jaws of the adapter for
increased sensitivity. The actual current in each case is the indicated current divided by the number of turns around the
jaws. Best accuracy is obtained by hanging the Model 10 on the single wire conductor.
Do not try to change ranges by changing the switch on the VOM. The adapter is calibrated to work on the AC AMPS or
the 3 AC VOLTS ranges only.
13


